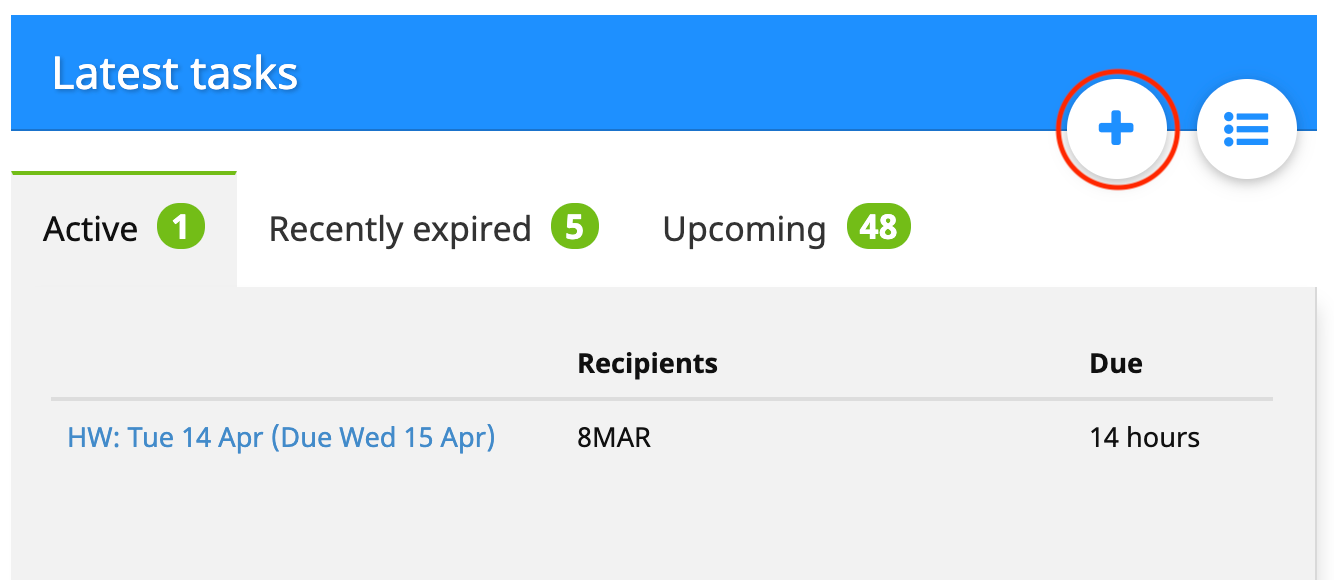
To create a task, from the home admin page click ‘+’ in upper right-hand corner of the Latest Tasks box.


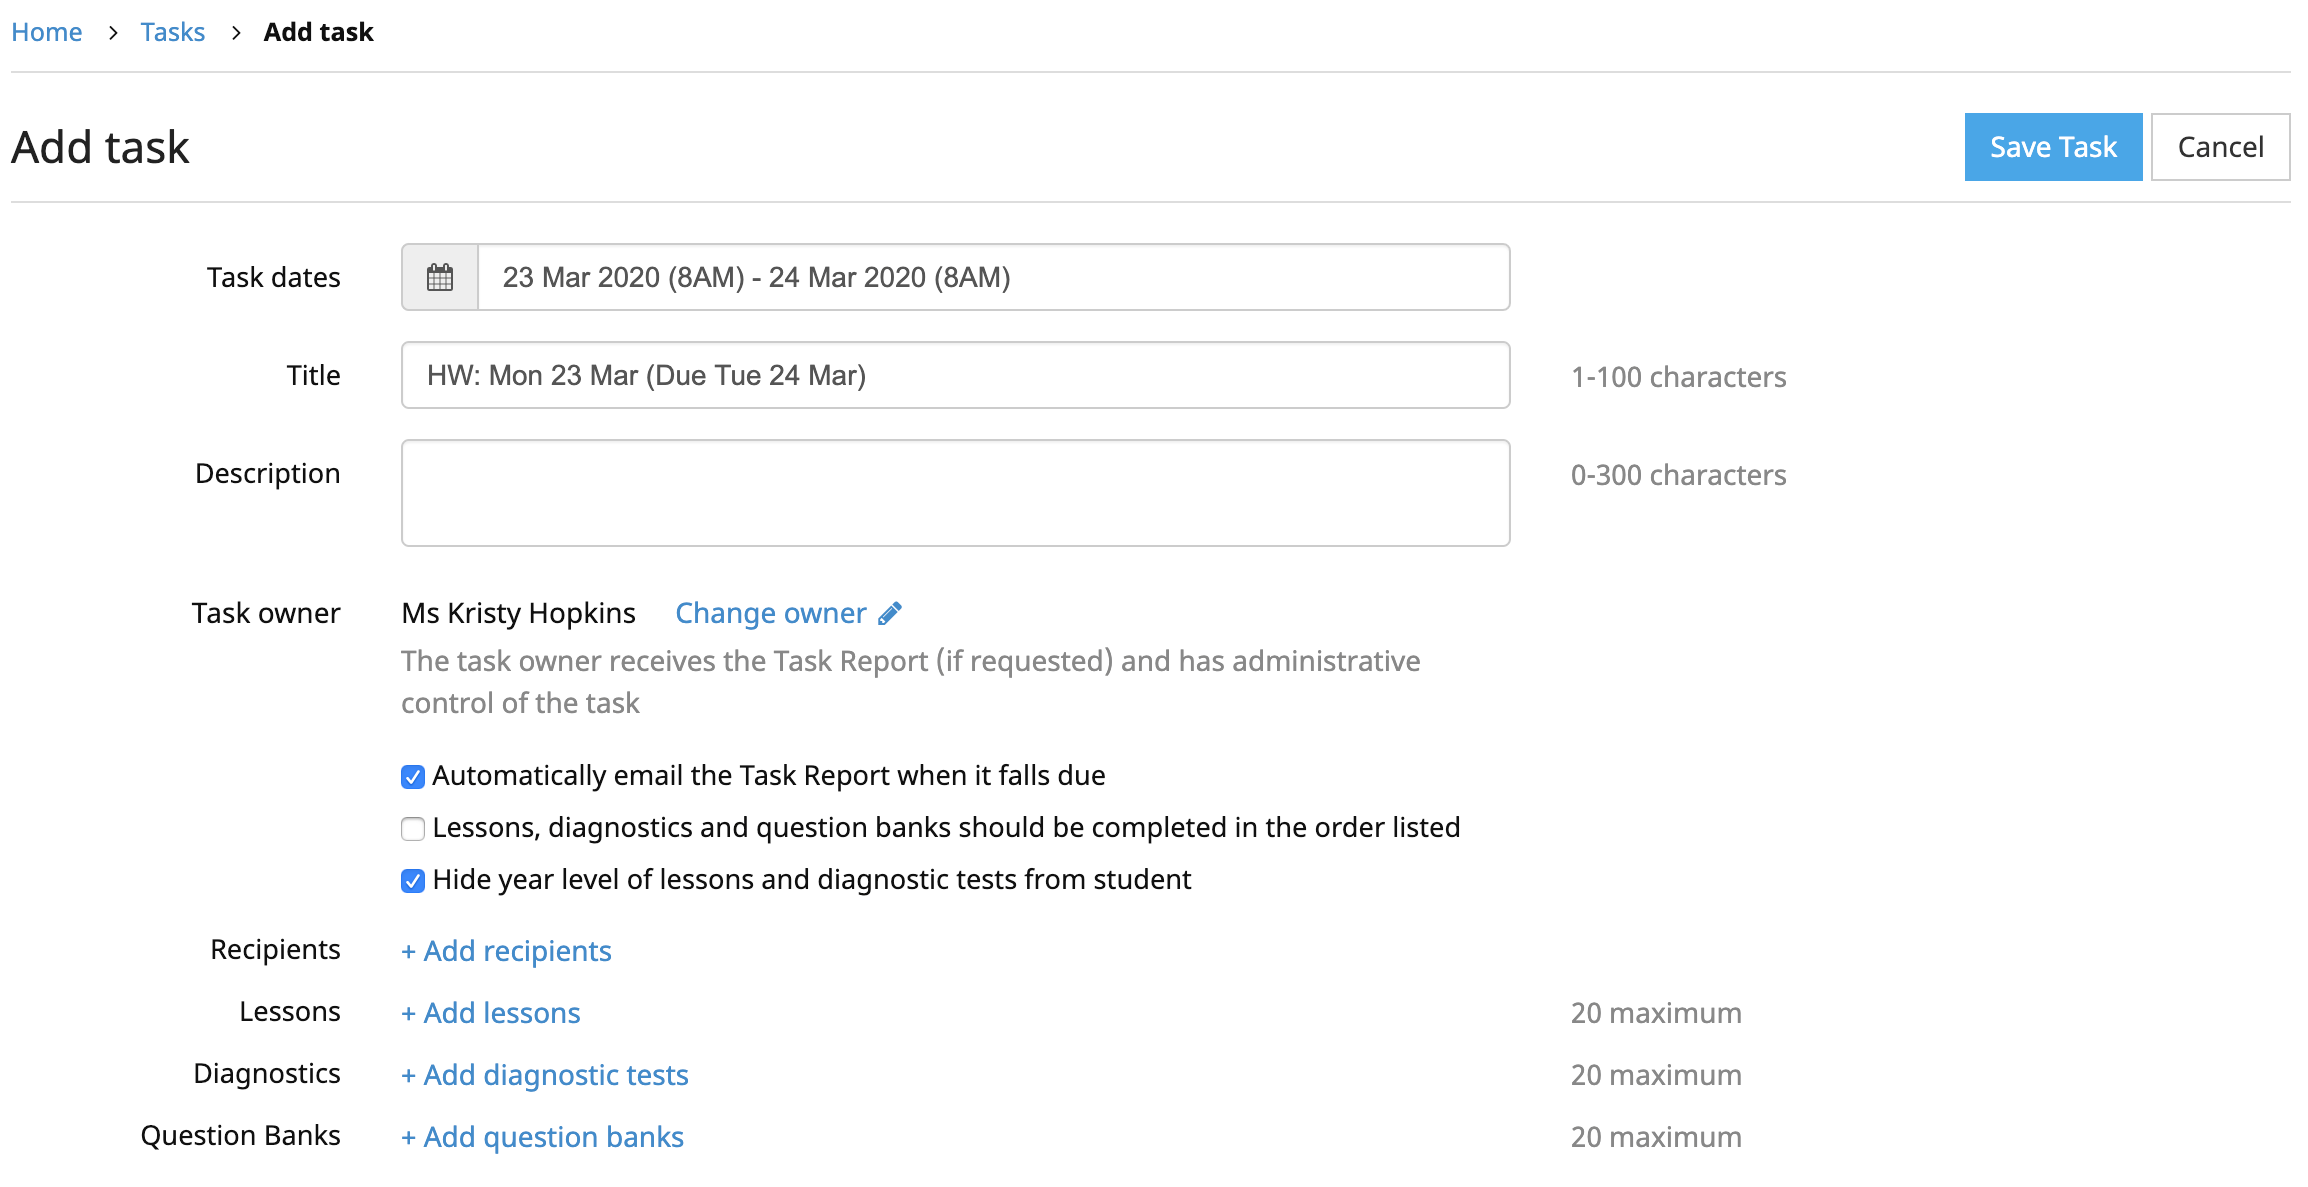
A new, empty task is created ready to be filled out. First, choose the date and time at which the task will be available to students, and the date and time when the task falls due. The default title for the task contains the selected start and due dates, but this can be changed. There is also the option for the teacher to write a note containing a reminder or additional information for the students.
Note: Setting or changing the task owner is only available to full administrators.
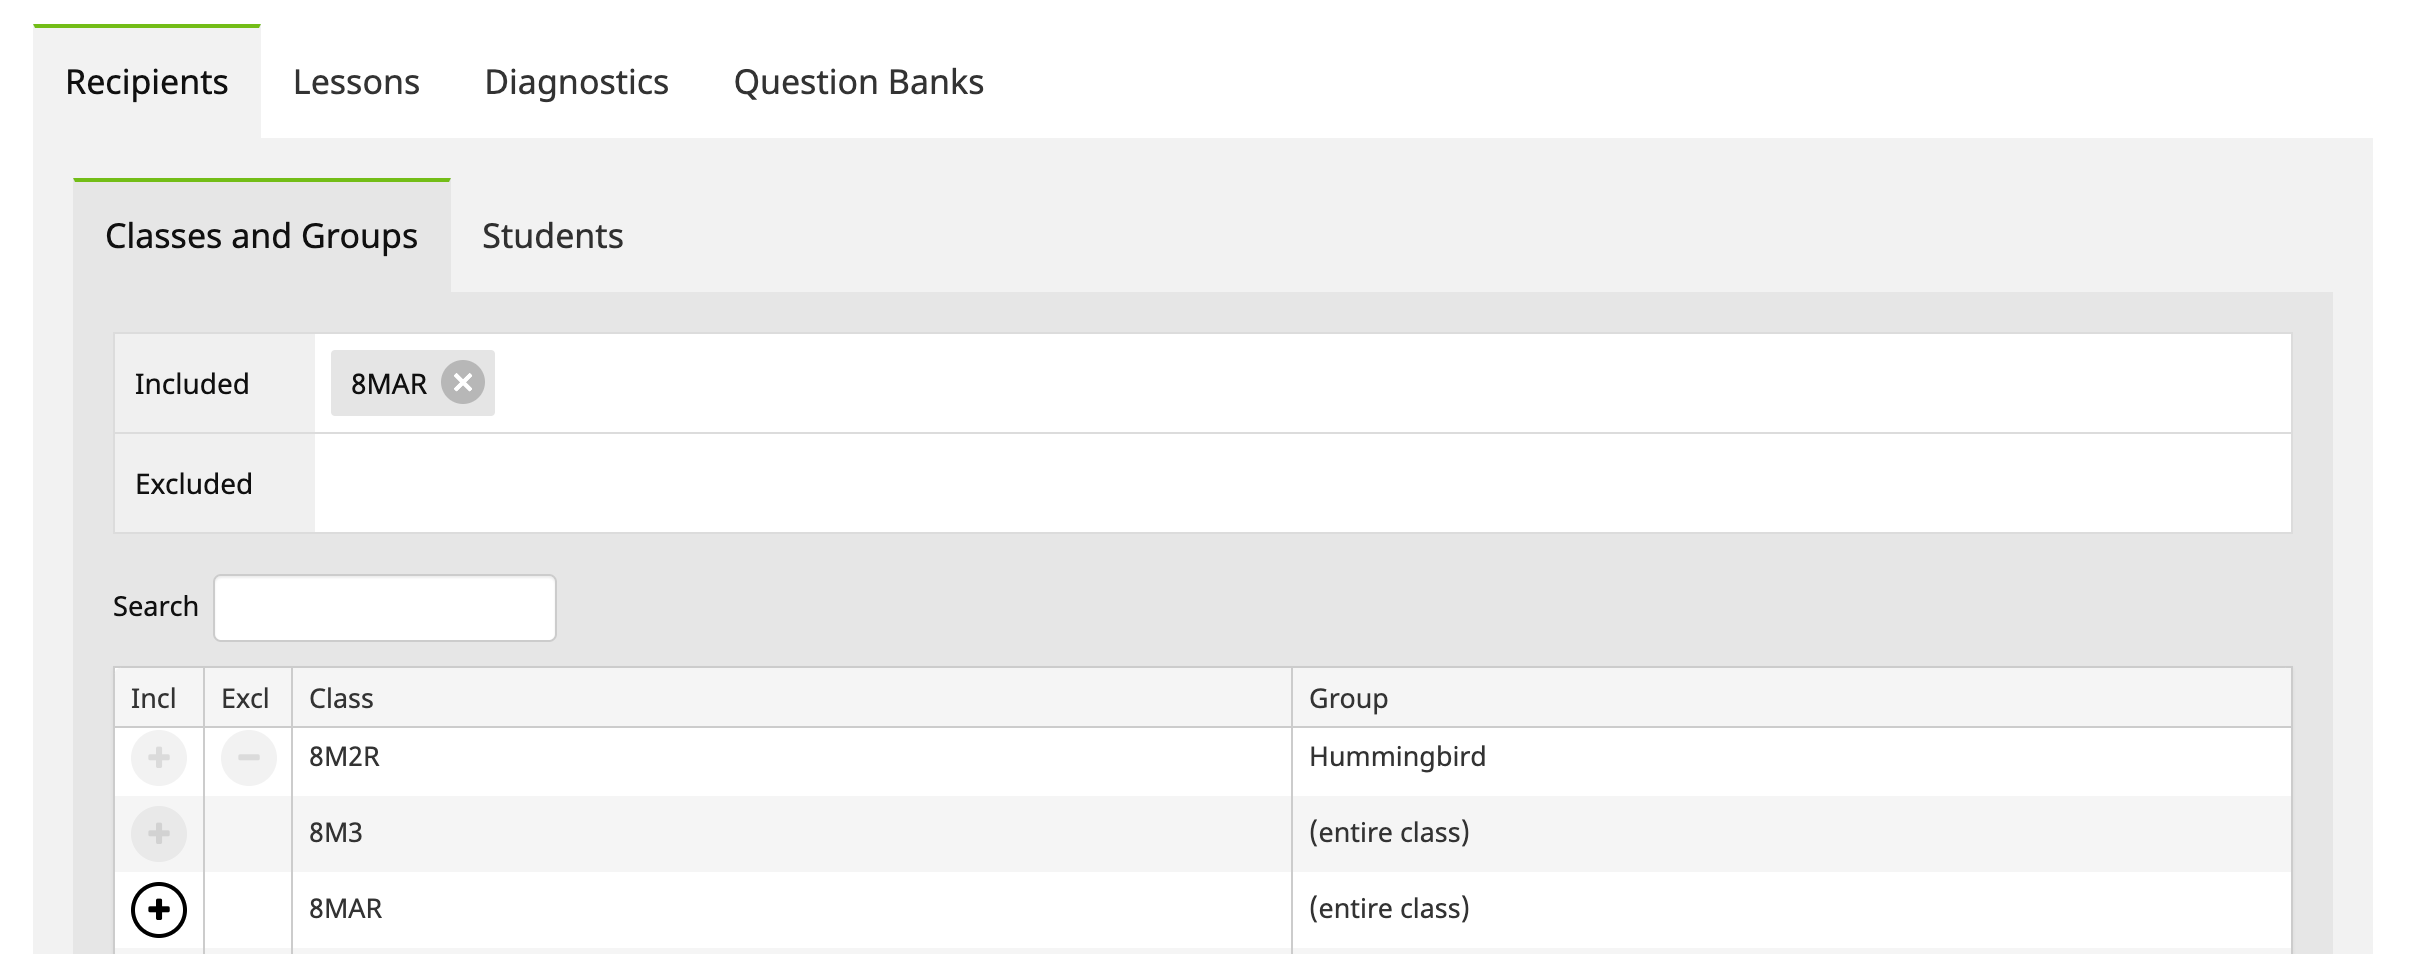
To select the Classes and Groups and/or Students to receive the task, click ‘+ Add recipients’. Click ‘+’ or ‘-’ to include or exclude Classes and Groups and/or Students from the task.

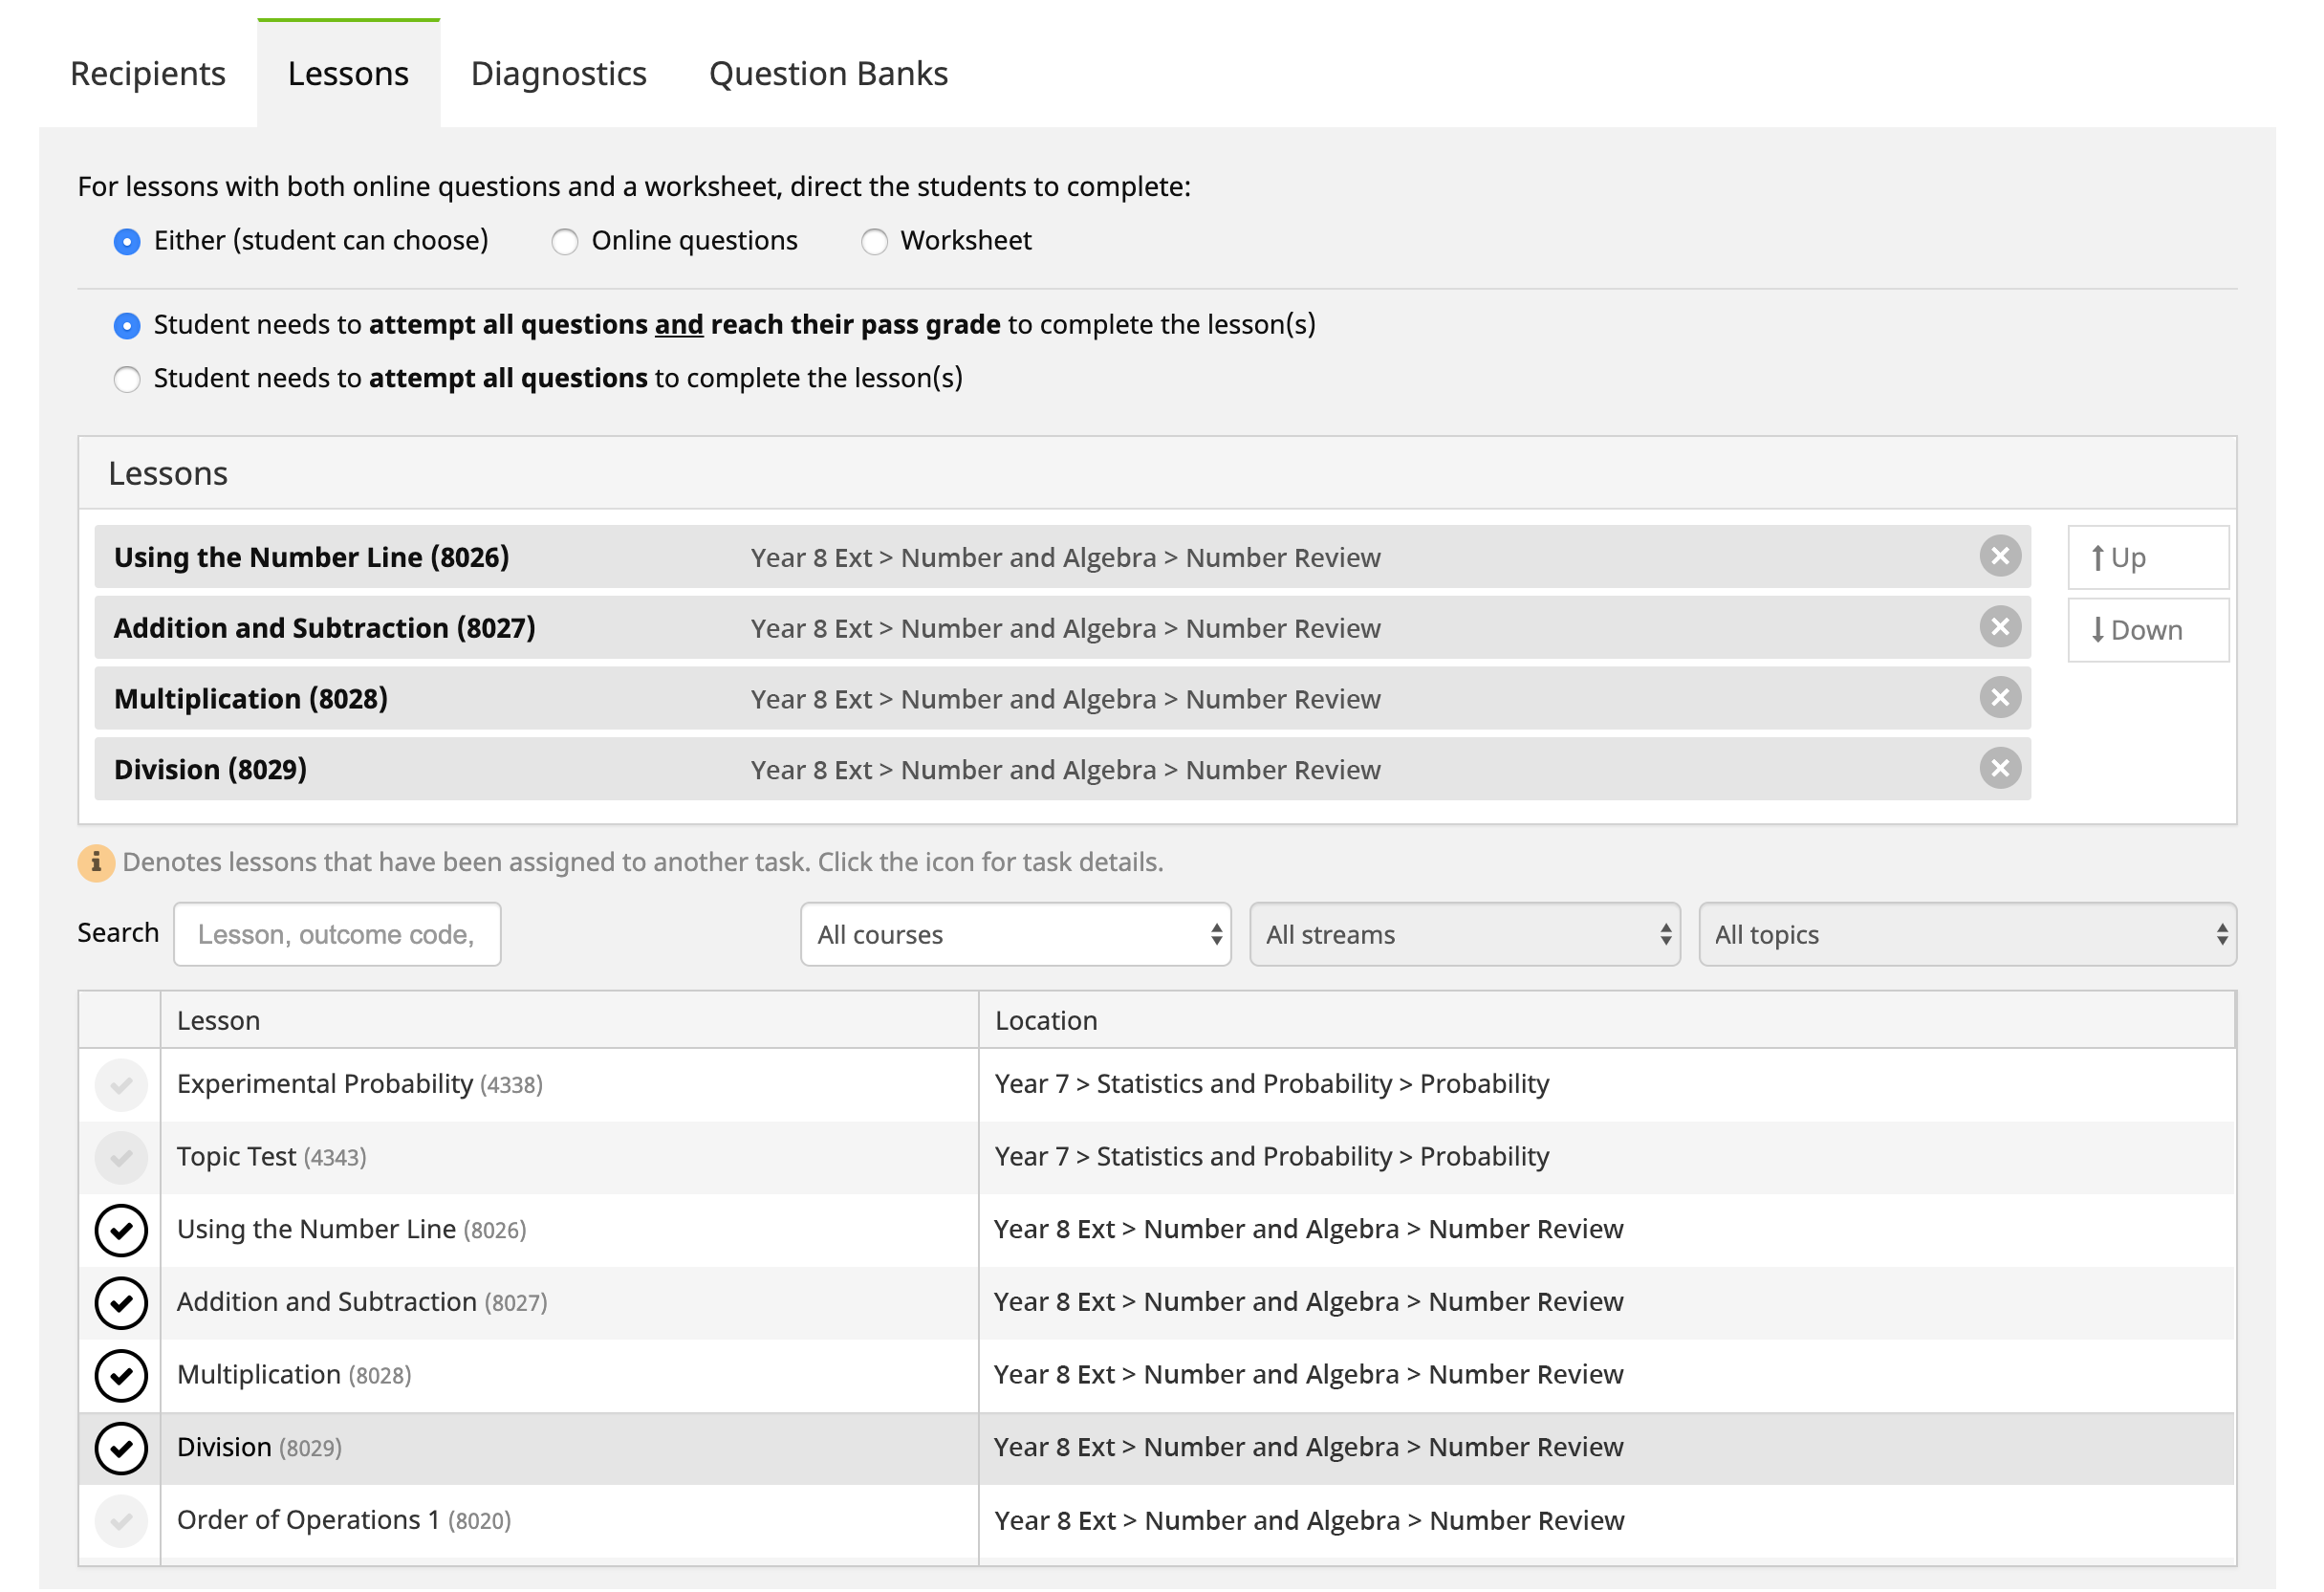
To select the lessons, click ‘+ Add lessons’. In the Lessons box you will see the lessons that have been added to the task. You can continue adding lessons by clicking the relevant check boxes until all required lessons have been added. Use the filters to display only lessons from particular courses, streams or topics. Or start typing the name of a lesson in the keyword search to see the matches.

You can change the order of the lessons if required, using the ‘Move Up’ and ‘Move Down’ buttons. You can specify online questions or worksheet where both exist. If students are required to complete the lessons in the given order, check the box in the upper left hand corner.
Finally, click ‘Save Task’. A confirmation notice will appear if the task was added successfully.